Sử dụng Thanh điều hướng
Thanh điều hướng chứa các nút điều hướng của bộ điều khiển điều hướng, các bộ điều khiển chế độ xem có thể được đẩy và bật lên. Tiêu đề trên thanh điều hướng là tiêu đề của bộ điều khiển chế độ xem hiện tại.
Mã mẫu và các bước
Bước 1 – Tạo một ứng dụng dựa trên chế độ xem.
Bước 2 – Bây giờ, chọn App Delegate.h và thêm thuộc tính cho bộ điều khiển điều hướng như sau:
#import <UIKit/UIKit.h>

@class ViewController;

@interface AppDelegate : UIResponder <UIApplicationDelegate>

@property (strong, nonatomic) UIWindow *window;

@property (strong, nonatomic) ViewController *viewController;

@property (strong, nonatomic) UINavigationController *navController;

@end
Bước 3 – Bây giờ cập nhật ứng dụng: phương thức didFinishLaunchingWithOptions: trong tệp AppDelegate.m , để phân bổ bộ điều khiển điều hướng và làm cho bộ điều khiển chế độ xem gốc của cửa sổ nó như sau:
- (BOOL)application:(UIApplication *)application
   didFinishLaunchingWithOptions:(NSDictionary *)launchOptions {
   self.window = [[UIWindow alloc] initWithFrame:
   [[UIScreen mainScreen] bounds]];

   // Override point for customization after application launch.
   self.viewController = [[ViewController alloc]
   initWithNibName:@"ViewController" bundle:nil];

   //Navigation controller init with ViewController as root
   UINavigationController *navController = [[UINavigationController alloc]
   initWithRootViewController:self.viewController];
   self.window.rootViewController = navController;
   [self.window makeKeyAndVisible];
   return YES;
}
Bước 4 – Thêm tệp lớp mới TempViewController bằng cách chọn Tệp → Mới → Tệp … → Lớp Objective C và sau đó đặt tên Lớp là TempViewController với lớp con UIViewController.
Bước 5 – Thêm UIButton navButon trong ViewController.h như sau:
// ViewController.h
#import <UIKit/UIKit.h>

@interface ViewController : UIViewController {
   UIButton *navButton;
}
@end
Bước 6 – Thêm một phương thức addNavigationBarItem và gọi phương thức trong viewDidLoad .
Bước 7 – Tạo một phương thức cho hành động của mục điều hướng.
Bước 8 – Chúng ta cũng cần tạo một phương thức khác để đẩy một bộ điều khiển chế độ xem khác TempViewController.
Bước 9 – ViewController.m được cập nhật như sau:
// ViewController.m
#import "ViewController.h"
#import "TempViewController.h"
@interface ViewController ()

@end
@implementation ViewController

- (void)viewDidLoad {
   [super viewDidLoad];
   [self addNavigationBarButton];
   //Do any additional setup after loading the view, typically from a nib
}

- (void)didReceiveMemoryWarning {
   [super didReceiveMemoryWarning];
   // Dispose of any resources that can be recreated.
}

-(IBAction)pushNewView:(id)sender {
   TempViewController *tempVC =[[TempViewController alloc]
   initWithNibName:@"TempViewController" bundle:nil];
   [self.navigationController pushViewController:tempVC animated:YES];
}

-(IBAction)myButtonClicked:(id)sender {
   // toggle hidden state for navButton
   [navButton setHidden:!nav.hidden];
}

-(void)addNavigationBarButton {
   UIBarButtonItem *myNavBtn = [[UIBarButtonItem alloc] initWithTitle:
   @"MyButton" style:UIBarButtonItemStyleBordered target:
   self action:@selector(myButtonClicked:)];

   [self.navigationController.navigationBar setBarStyle:UIBarStyleBlack];
   [self.navigationItem setRightBarButtonItem:myNavBtn];

   // create a navigation push button that is initially hidden
   navButton = [UIButton buttonWithType:UIButtonTypeRoundedRect];
   [navButton setFrame:CGRectMake(60, 50, 200, 40)];
   [navButton setTitle:@"Push Navigation" forState:UIControlStateNormal];
   [navButton addTarget:self action:@selector(pushNewView:)
   forControlEvents:UIControlEventTouchUpInside];
   [self.view addSubview:navButton];
   [navButton setHidden:YES];
}
@end
Bước 10 – Khi chúng tôi chạy ứng dụng, chúng tôi sẽ nhận được kết quả sau:

Bước 11 – Khi nhấp vào nút điều hướng MyButton, khả năng hiển thị của nút điều hướng được bật tắt.
Bước 12 – Khi nhấp vào nút điều hướng đẩy, một bộ điều khiển chế độ xem khác được đẩy như hình dưới đây.

iOS – Thanh tab
Sử dụng thanh tab
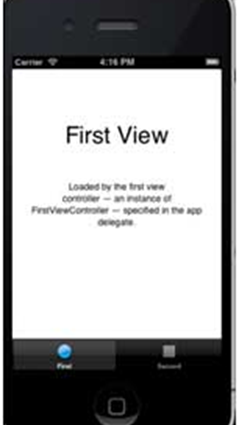
Nó thường được sử dụng để chuyển đổi giữa các nhiệm vụ con, chế độ xem hoặc mô hình khác nhau trong cùng một chế độ xem. Ví dụ cho thanh tab được hiển thị bên dưới.

Thuộc tính quan trọng
- hình nền
- mặt hàng
- chọn mục
Mã mẫu và các bước
Bước 1 – Tạo một dự án mới và chọn Ứng dụng theo thẻ thay vì ứng dụng Dựa trên Chế độ xem và nhấp vào tiếp theo , Đặt tên cho dự án và chọn tạo .
Bước 2 – Ở đây, hai bộ điều khiển chế độ xem được tạo theo mặc định và một thanh tab được thêm vào ứng dụng của chúng tôi.
Bước 3 – Phương thức AppDelegate.m didFinishLaunchingWithOptions như sau:
- (BOOL)application:(UIApplication *)application
   didFinishLaunchingWithOptions:(NSDictionary *)launchOptions {
   self.window = [[UIWindow alloc] initWithFrame:[[UIScreen mainScreen]
   bounds]];

   // Override point for customization after application launch.
   UIViewController *viewController1 = [[FirstViewController alloc]
   initWithNibName:@"FirstViewController" bundle:nil];
   UIViewController *viewController2 = [[SecondViewController alloc]
   initWithNibName:@"SecondViewController" bundle:nil];
   self.tabBarController = [[UITabBarController alloc] init];
   self.tabBarController.viewControllers = @[viewController1,
   viewController2];
   self.window.rootViewController = self.tabBarController;
   [self.window makeKeyAndVisible];
   return YES;
}
Bước 4 – Tại đây, hai bộ điều khiển chế độ xem được cấp phát và tạo thành bộ điều khiển chế độ xem của bộ điều khiển thanh tab của chúng tôi.
Bước 5 – Khi chúng tôi chạy ứng dụng, chúng tôi sẽ nhận được kết quả sau:

iOS – Chế độ xem hình ảnh
Sử dụng Chế độ xem Hình ảnh
Chế độ xem hình ảnh được sử dụng để hiển thị một hình ảnh đơn lẻ hoặc chuỗi hình ảnh động.
Thuộc tính quan trọng
- hình ảnh
- highlightedImage
- userInteractionEnabled
- hình ảnh động
- animationRepeatCount
Các phương pháp quan trọng
- (id)initWithImage:(UIImage *)image
- (id)initWithImage:(UIImage *)image highlightedImage: (UIImage *)highlightedImage
- (void)startAnimating
- (void)stopAnimating
Thêm một phương thức tùy chỉnh addImageView
-(void)addImageView {
   UIImageView *imgview = [[UIImageView alloc]
   initWithFrame:CGRectMake(10, 10, 300, 400)];
   [imgview setImage:[UIImage imageNamed:@"AppleUSA1.jpg"]];
   [imgview setContentMode:UIViewContentModeScaleAspectFit];
   [self.view addSubview:imgview];
}
Thêm một phương pháp tùy chỉnh khác addImageViewWithAnimation
Phương pháp này giải thích cách tạo hình ảnh động trong imageView.
-(void)addImageViewWithAnimation {
   UIImageView *imgview = [[UIImageView alloc]
   initWithFrame:CGRectMake(10, 10, 300, 400)];

   // set an animation
   imgview.animationImages = [NSArray arrayWithObjects:
   [UIImage imageNamed:@"AppleUSA1.jpg"],
   [UIImage imageNamed:@"AppleUSA2.jpg"], nil];
   imgview.animationDuration = 4.0;
   imgview.contentMode = UIViewContentModeCenter;
   [imgview startAnimating];
   [self.view addSubview:imgview];
}
Lưu ý –
Chúng tôi phải thêm hình ảnh có tên là “AppleUSA1.jpg” và “AppleUSA2.jpg” vào dự án của mình, có thể thực hiện bằng cách kéo hình ảnh vào khu vực điều hướng nơi các tệp dự án của chúng tôi được liệt kê. Cập nhật viewDidLoad trong ViewController.m như sau:
(void)viewDidLoad {
   [super viewDidLoad];
   [self addImageView];
}
Đầu ra
Khi chúng tôi chạy ứng dụng, chúng tôi sẽ nhận được kết quả sau:

Bạn có thể thử gọi addImageViewWithAnimation thay vì phương thức addImageView để xem hiệu ứng hoạt ảnh của chế độ xem hình ảnh
