Sử dụng Chế độ xem Văn bản
Chế độ xem Văn bản được sử dụng để hiển thị nhiều dòng văn bản có thể cuộn, có thể chỉnh sửa tùy chọn.
Thuộc tính quan trọng
- dataDetectorTypes
- ủy nhiệm
- có thể chỉnh sửa
- inputAccessoryView
- inputView
- chữ
- textAlignment
- văn bản màu
Các phương pháp ủy quyền quan trọng
Các phương pháp ủy quyền quan trọng
-(void)textViewDidBeginEditing:(UITextView *)textView
-(void)textViewDidEndEditing:(UITextView *)textView
-(void)textViewDidChange:(UITextView *)textView
-(BOOL)textViewShouldEndEditing:(UITextView *)textView
Thêm phương thức tùy chỉnh addTextView
-(void)addTextView {
   myTextView = [[UITextView alloc]initWithFrame:
   CGRectMake(10, 50, 300, 200)];
   [myTextView setText:@"Lorem ipsum dolor sit er elit lamet, consectetaur
   cillium adipisicing pecu, sed do eiusmod tempor incididunt ut labore et
   dolore magna aliqua. Ut enim ad minim veniam, quis nostrud exercitation
   ullamco laboris nisi ut aliquip ex ea commodo consequat. Duis aute irure
   dolor in reprehenderit in voluptate velit esse cillum dolore eu fugiat
   nulla pariatur. Excepteur sint occaecat cupidatat non proident, sunt in
   culpa qui officia deserunt mollit anim id est laborum. Nam liber te
   conscient to factor tum poen legum odioque civiuda.
   Lorem ipsum dolor sit er elit lamet, consectetaur cillium adipisicing
   pecu, sed do eiusmod tempor incididunt ut labore et dolore magna aiqua.
   Ut enim ad minim veniam, quis nostrud exercitation ullamco laboris nisi
   aliquip ex ea commodo consequat. Duis aute irure dolor in reprehenderit
   in voluptate velit esse cillum dolore eu fugiat nulla pariatur.
   Excepteur sint occaecat cupidatat non proident, sunt in culpa
   qui officia deserunt mollit anim id est laborum. Nam liber te conscient
   to factor tum poen legum odioque civiuda."];
   myTextView.delegate = self;
   [self.view addSubview:myTextView];
}
Triển khai các đại biểu textView trong ViewController.m
#pragma mark - Text View delegates

-(BOOL)textView:(UITextView *)textView shouldChangeTextInRange:
   (NSRange)range replacementText:(NSString *)text {

   if ([text isEqualToString:@"\n"]) {
      [textView resignFirstResponder];
   }
   return YES;
}

-(void)textViewDidBeginEditing:(UITextView *)textView {
   NSLog(@"Did begin editing");
}

-(void)textViewDidChange:(UITextView *)textView {
   NSLog(@"Did Change");
}

-(void)textViewDidEndEditing:(UITextView *)textView {
   NSLog(@"Did End editing");
}

-(BOOL)textViewShouldEndEditing:(UITextView *)textView {
   [textView resignFirstResponder];
   return YES;
}
Cập nhật viewDidLoad trong ViewController.m như sau
(void)viewDidLoad {
   [super viewDidLoad];
   [self addTextView];
}
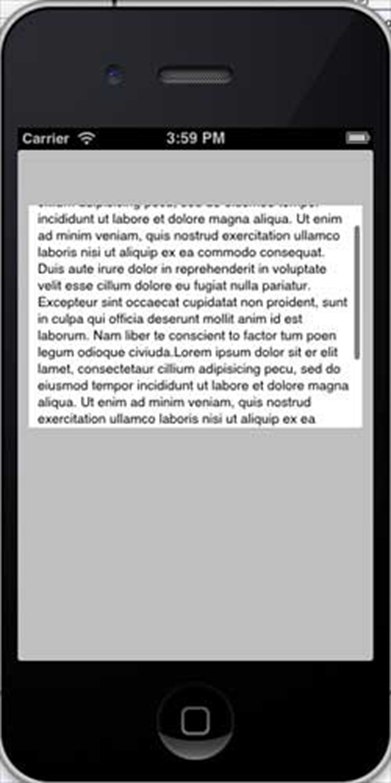
Đầu ra
Khi chúng tôi chạy ứng dụng, chúng tôi sẽ nhận được kết quả sau:
iOS – Xem chuyển đổi
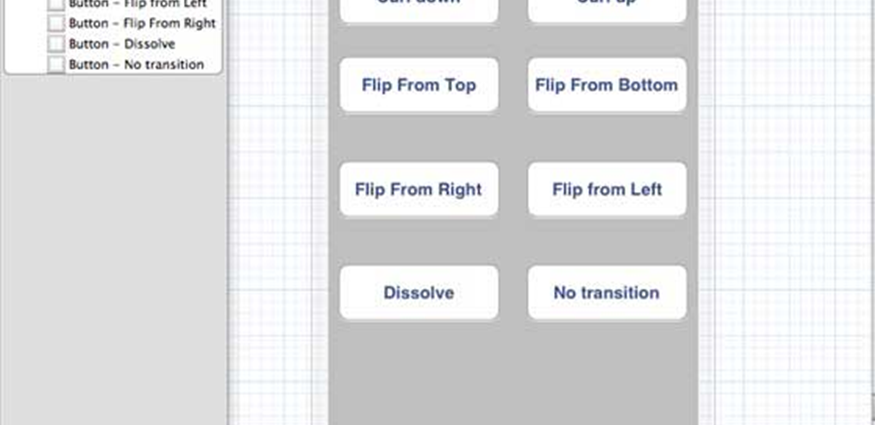
Sử dụng chuyển đổi chế độ xem
Chế độ xem Chuyển tiếp là cách hiệu quả để thêm một chế độ xem trên một chế độ xem khác với hiệu ứng hoạt ảnh chuyển tiếp thích hợp. Cập nhật ViewController.xib như sau:
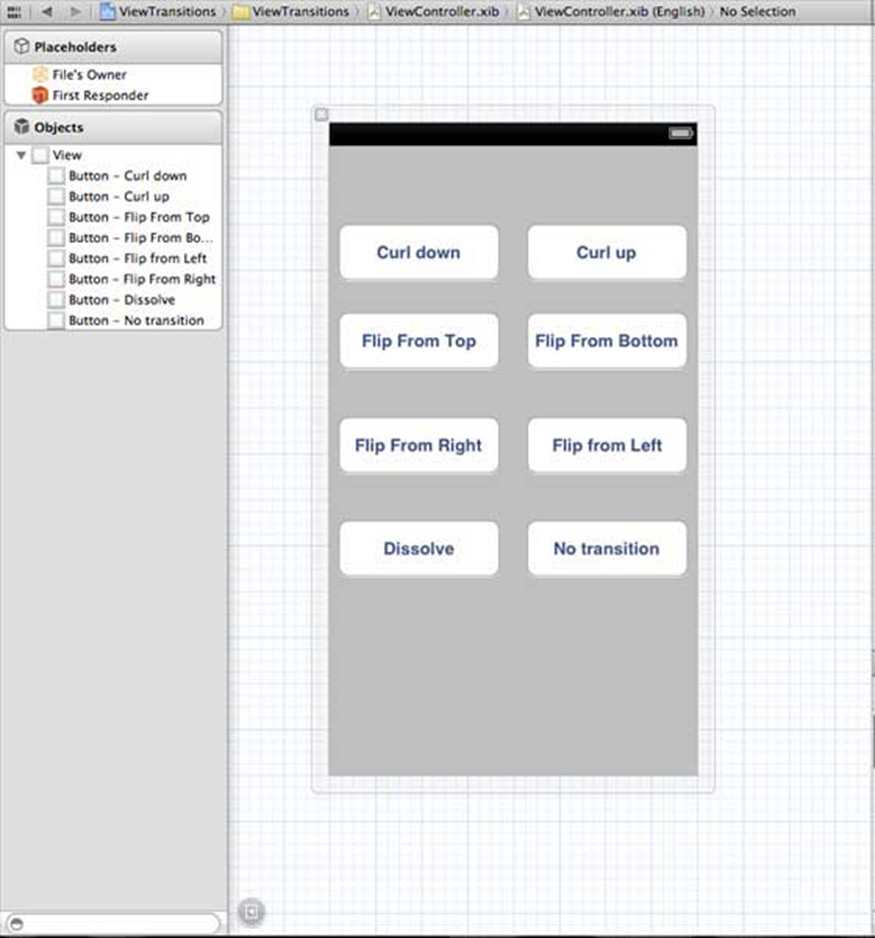
Tạo hành động cho các nút được tạo trong xib.
Cập nhật ViewController.h
Khai báo hai thể hiện dạng xem trong lớp ViewController. Tệp ViewController.h sẽ trông như sau sau khi tạo các hành động:
#import <UIKit/UIKit.h>

@interface ViewController : UIViewController {
   UIView *view1;
   UIView *view2;
}

-(IBAction)flipFromLeft:(id)sender;
-(IBAction)flipFromRight:(id)sender;
-(IBAction)flipFromTop:(id)sender;
-(IBAction)flipFromBottom:(id)sender;
-(IBAction)curlUp:(id)sender;
-(IBAction)curlDown:(id)sender;
-(IBAction)dissolve:(id)sender;
-(IBAction)noTransition:(id)sender;

@end
Cập nhật ViewController.m
Chúng tôi sẽ thêm một phương thức tùy chỉnh setUpView để khởi tạo các khung nhìn. Chúng tôi cũng tạo một phương thức khác doTransitionWithType:
tạo ra sự chuyển đổi từ view1 sang view2 hoặc ngược lại. Sau đó, chúng tôi sẽ triển khai các phương thức hành động mà chúng tôi đã tạo trước đó gọi phương thức doTransitionWithType: với kiểu chuyển tiếp. ViewController.m được cập nhật như sau:
#import "ViewController.h"

@interface ViewController ()

@end

@implementation ViewController

- (void)viewDidLoad {
   [super viewDidLoad];
   [self setUpView];
   // Do any additional setup after loading the view, typically from a nib.
}

-(void)setUpView {
   view1 = [[UIView alloc]initWithFrame:self.view.frame];
   view1.backgroundColor = [UIColor lightTextColor];
   view2 = [[UIView alloc]initWithFrame:self.view.frame];
   view2.backgroundColor = [UIColor orangeColor];
   [self.view addSubview:view1];
   [self.view sendSubviewToBack:view1];
}

-(void)doTransitionWithType:(UIViewAnimationTransition)animationTransitionType {
   if ([[self.view subviews] containsObject:view2 ]) {
      [UIView transitionFromView:view2
      toView:view1
      duration:2
      options:animationTransitionType
      completion:^(BOOL finished) {
         [view2 removeFromSuperview];
      }];
      [self.view addSubview:view1];
      [self.view sendSubviewToBack:view1];
   } else {
      [UIView transitionFromView:view1
      toView:view2
      duration:2
      options:animationTransitionType
      completion:^(BOOL finished) {
         [view1 removeFromSuperview];
      }];
      [self.view addSubview:view2];
      [self.view sendSubviewToBack:view2];
   }
}

-(IBAction)flipFromLeft:(id)sender {
   [self doTransitionWithType:UIViewAnimationOptionTransitionFlipFromLeft];
}

-(IBAction)flipFromRight:(id)sender {
   [self doTransitionWithType:UIViewAnimationOptionTransitionFlipFromRight];
}

-(IBAction)flipFromTop:(id)sender {
   [self doTransitionWithType:UIViewAnimationOptionTransitionFlipFromTop];
}

-(IBAction)flipFromBottom:(id)sender {
   [self doTransitionWithType:UIViewAnimationOptionTransitionFlipFromBottom];
}

-(IBAction)curlUp:(id)sender {
   [self doTransitionWithType:UIViewAnimationOptionTransitionCurlUp];
}

-(IBAction)curlDown:(id)sender {
   [self doTransitionWithType:UIViewAnimationOptionTransitionCurlDown];
}

-(IBAction)dissolve:(id)sender {
   [self doTransitionWithType:UIViewAnimationOptionTransitionCrossDissolve];
}

-(IBAction)noTransition:(id)sender{
   [self doTransitionWithType:UIViewAnimationOptionTransitionNone];
}

- (void)didReceiveMemoryWarning {
   [super didReceiveMemoryWarning];
   // Dispose of any resources that can be recreated.
}
@end
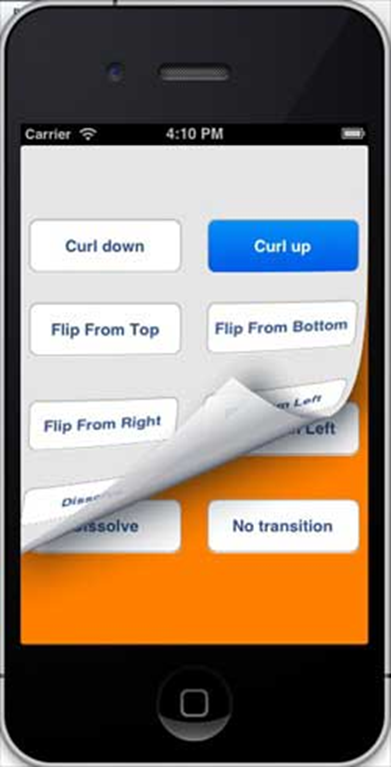
Đầu ra
Khi chúng tôi chạy ứng dụng, chúng tôi sẽ nhận được kết quả sau:
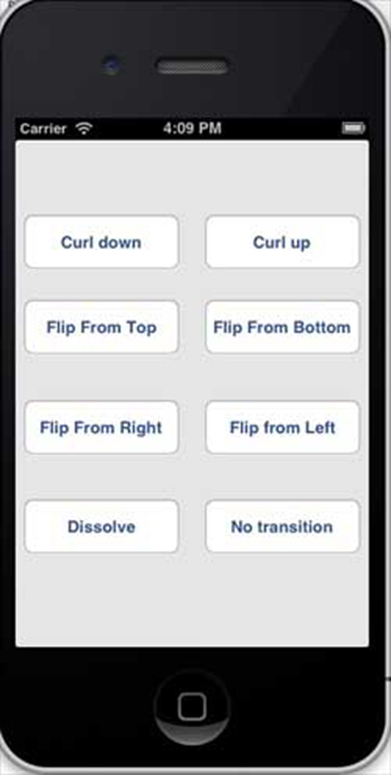
Bạn có thể chọn các nút khác nhau để xem quá trình chuyển đổi hoạt động như thế nào. Khi chọn cuộn tròn, quá trình chuyển đổi sẽ như sau: