Bố cục tự động đã được giới thiệu trong iOS 6.0. Khi chúng tôi sử dụng bố cục tự động, mục tiêu triển khai của chúng tôi phải là 6.0 trở lên. Bố cục tự động giúp chúng tôi tạo giao diện có thể được sử dụng cho nhiều hướng và nhiều thiết bị.
Mục tiêu của ví dụ của chúng tôi
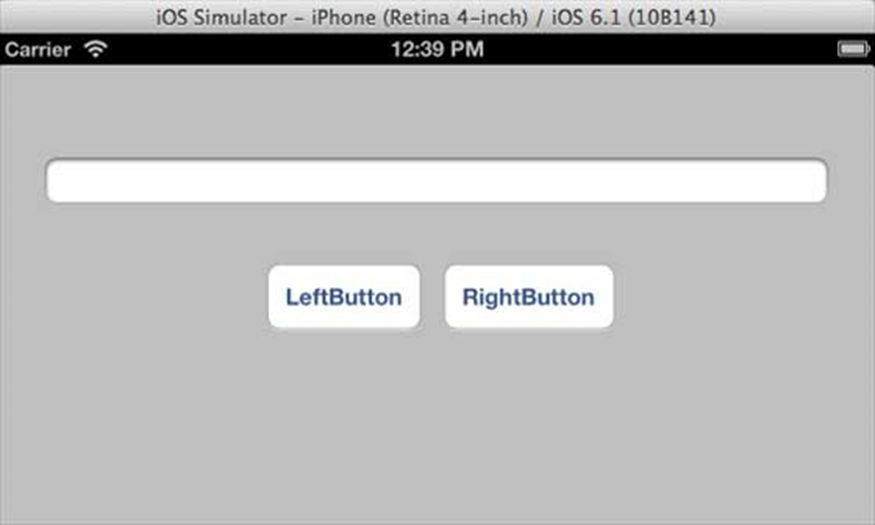
Chúng tôi sẽ thêm hai nút sẽ được đặt ở một khoảng cách nhất định từ tâm màn hình. Chúng tôi cũng sẽ cố gắng thêm một trường văn bản có thể thay đổi kích thước sẽ được đặt từ một khoảng cách nhất định từ phía trên các nút.
Cách tiếp cận của chúng ta
Chúng tôi sẽ thêm một trường văn bản và hai nút trong mã cùng với các ràng buộc của chúng. Các ràng buộc của mỗi Phần tử giao diện người dùng sẽ được tạo và thêm vào chế độ xem siêu cấp. Chúng tôi sẽ phải tắt tính năng tự động thay đổi kích thước cho từng phần tử giao diện người dùng mà chúng tôi thêm vào để có được kết quả mong muốn.
Các bước liên quan
Bước 1 – Tạo một ứng dụng dựa trên chế độ xem đơn giản.
Bước 2 – Chúng tôi sẽ chỉ chỉnh sửa ViewController.m và nó như sau:
#import "ViewController.h"

@interface ViewController ()
@property (nonatomic, strong) UIButton *leftButton;
@property (nonatomic, strong) UIButton *rightButton;
@property (nonatomic, strong) UITextField *textfield;

@end
@implementation ViewController

- (void)viewDidLoad {
   [super viewDidLoad];
   UIView *superview = self.view;

   /*1. Create leftButton and add to our view*/
   self.leftButton = [UIButton buttonWithType:UIButtonTypeRoundedRect];
   self.leftButton.translatesAutoresizingMaskIntoConstraints = NO;
   [self.leftButton setTitle:@"LeftButton" forState:UIControlStateNormal];
   [self.view addSubview:self.leftButton];

   /* 2. Constraint to position LeftButton's X*/
   NSLayoutConstraint *leftButtonXConstraint = [NSLayoutConstraint
   constraintWithItem:self.leftButton attribute:NSLayoutAttributeCenterX
   relatedBy:NSLayoutRelationGreaterThanOrEqual toItem:superview attribute:
   NSLayoutAttributeCenterX multiplier:1.0 constant:-60.0f];

   /* 3. Constraint to position LeftButton's Y*/
   NSLayoutConstraint *leftButtonYConstraint = [NSLayoutConstraint
   constraintWithItem:self.leftButton attribute:NSLayoutAttributeCenterY
   relatedBy:NSLayoutRelationEqual toItem:superview attribute:
   NSLayoutAttributeCenterY multiplier:1.0f constant:0.0f];

   /* 4. Add the constraints to button's superview*/
   [superview addConstraints:@[ leftButtonXConstraint,
   leftButtonYConstraint]];

   /*5. Create rightButton and add to our view*/
   self.rightButton = [UIButton buttonWithType:UIButtonTypeRoundedRect];
   self.rightButton.translatesAutoresizingMaskIntoConstraints = NO;
   [self.rightButton setTitle:@"RightButton" forState:UIControlStateNormal];
   [self.view addSubview:self.rightButton];

   /*6. Constraint to position RightButton's X*/
   NSLayoutConstraint *rightButtonXConstraint = [NSLayoutConstraint
   constraintWithItem:self.rightButton attribute:NSLayoutAttributeCenterX
   relatedBy:NSLayoutRelationGreaterThanOrEqual toItem:superview attribute:
   NSLayoutAttributeCenterX multiplier:1.0 constant:60.0f];

   /*7. Constraint to position RightButton's Y*/
   rightButtonXConstraint.priority = UILayoutPriorityDefaultHigh;
   NSLayoutConstraint *centerYMyConstraint = [NSLayoutConstraint
   constraintWithItem:self.rightButton attribute:NSLayoutAttributeCenterY
   relatedBy:NSLayoutRelationGreaterThanOrEqual toItem:superview attribute:
   NSLayoutAttributeCenterY multiplier:1.0f constant:0.0f];
   [superview addConstraints:@[centerYMyConstraint,
   rightButtonXConstraint]];

   //8. Add Text field
   self.textfield = [[UITextField alloc]initWithFrame:
   CGRectMake(0, 100, 100, 30)];
   self.textfield.borderStyle = UITextBorderStyleRoundedRect;
   self.textfield.translatesAutoresizingMaskIntoConstraints = NO;
   [self.view addSubview:self.textfield];

   //9. Text field Constraints
   NSLayoutConstraint *textFieldTopConstraint = [NSLayoutConstraint
   constraintWithItem:self.textfield attribute:NSLayoutAttributeTop
   relatedBy:NSLayoutRelationGreaterThanOrEqual toItem:superview
   attribute:NSLayoutAttributeTop multiplier:1.0 constant:60.0f];
   NSLayoutConstraint *textFieldBottomConstraint = [NSLayoutConstraint
   constraintWithItem:self.textfield attribute:NSLayoutAttributeTop
   relatedBy:NSLayoutRelationGreaterThanOrEqual toItem:self.rightButton
   attribute:NSLayoutAttributeTop multiplier:0.8 constant:-60.0f];
   NSLayoutConstraint *textFieldLeftConstraint = [NSLayoutConstraint
   constraintWithItem:self.textfield attribute:NSLayoutAttributeLeft
   relatedBy:NSLayoutRelationEqual toItem:superview attribute:
   NSLayoutAttributeLeft multiplier:1.0 constant:30.0f];
   NSLayoutConstraint *textFieldRightConstraint = [NSLayoutConstraint
   constraintWithItem:self.textfield attribute:NSLayoutAttributeRight
   relatedBy:NSLayoutRelationEqual toItem:superview attribute:
   NSLayoutAttributeRight multiplier:1.0 constant:-30.0f];
   [superview addConstraints:@[textFieldBottomConstraint ,
   textFieldLeftConstraint, textFieldRightConstraint,
   textFieldTopConstraint]];
}

- (void)didReceiveMemoryWarning {
   [super didReceiveMemoryWarning];
   // Dispose of any resources that can be recreated.
}
@end
Điểm cần lưu ý
Trong các bước được đánh dấu 1, 5 và 8, chúng tôi chỉ cần thêm hai nút và một trường văn bản tương ứng theo chương trình.
Trong phần còn lại của các bước, chúng tôi đã tạo các ràng buộc và thêm các ràng buộc đó vào các siêu khung nhìn tương ứng, chúng thực sự là các khung nhìn tự. Các ràng buộc của một trong các nút bên trái như hình dưới đây:
NSLayoutConstraint *leftButtonXConstraint = [NSLayoutConstraint
constraintWithItem:self.leftButton attribute:NSLayoutAttributeCenterX
relatedBy:NSLayoutRelationGreaterThanOrEqual toItem:superview attribute:
NSLayoutAttributeCenterX multiplier:1.0 constant:-60.0f];
Chúng tôi có bindWithItem và toItem quyết định giữa các phần tử giao diện người dùng mà chúng tôi đang tạo ràng buộc. Thuộc tính quyết định hai yếu tố được liên kết với nhau dựa trên cơ sở nào. “RelatedBy” quyết định mức độ ảnh hưởng của các thuộc tính giữa các phần tử. Hệ số nhân là hệ số nhân và hằng số sẽ được thêm vào bộ đa ghép.
Trong ví dụ trên, X của leftButton luôn lớn hơn hoặc bằng -60 pixel đối với tâm của siêu chế độ xem. Tương tự, các ràng buộc khác được xác định.
Đầu ra
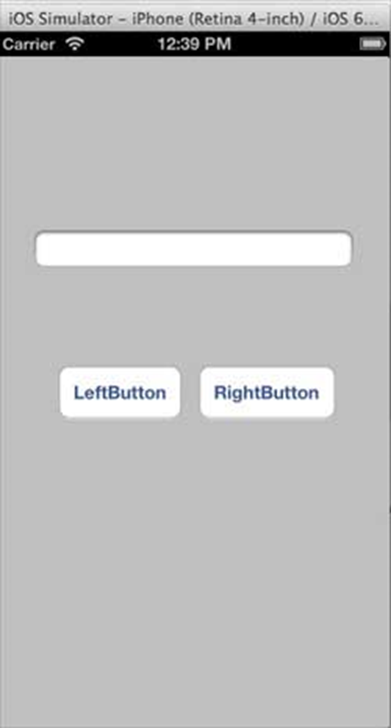
Khi chúng tôi chạy ứng dụng, chúng tôi sẽ nhận được kết quả sau trên trình mô phỏng iPhone:

Khi chúng tôi thay đổi hướng của trình mô phỏng sang hướng ngang, chúng tôi sẽ nhận được kết quả sau:
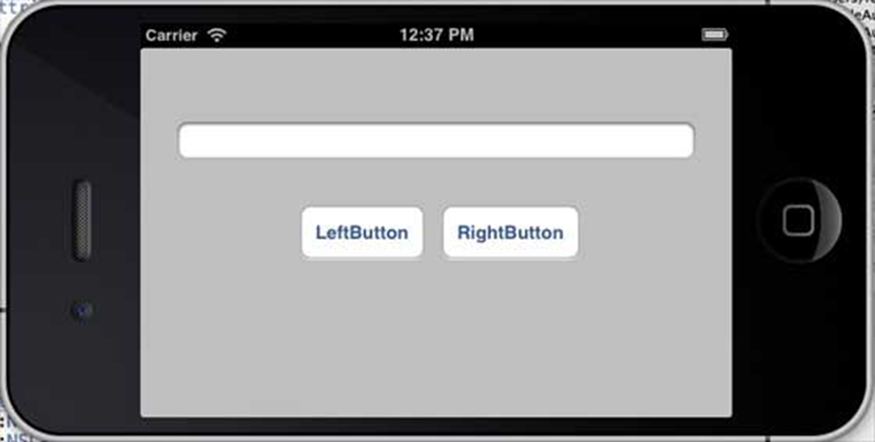
Khi chúng tôi chạy cùng một ứng dụng trên trình mô phỏng iPhone 5, chúng tôi sẽ nhận được kết quả sau:
Khi chúng tôi thay đổi hướng của trình mô phỏng sang hướng ngang, chúng tôi sẽ nhận được kết quả sau:
iOS – Twitter và Facebook
Twitter đã được tích hợp trong iOS 5.0 và Facebook đã được tích hợp trong iOS 6.0 . Hướng dẫn của chúng tôi tập trung vào việc sử dụng các lớp do Apple cung cấp và các mục tiêu triển khai cho Twitter và Facebook lần lượt là iOS 5.0 và iOS 6.0.
Các bước liên quan
Bước 1 – Tạo một ứng dụng dựa trên chế độ xem đơn giản.
Bước 2 – Chọn tệp dự án của bạn, sau đó chọn mục tiêu và sau đó thêm Social.framewor k và Accounts.framework trong chọn khung công tác .
Bước 3 – Thêm hai nút có tên facebookPost và twitterPost và tạo ibActions cho chúng.
Bước 4 – Cập nhật ViewController.h như sau:
#import <Social/Social.h>
#import <Accounts/Accounts.h>
#import <UIKit/UIKit.h>
@interface ViewController : UIViewController
-(IBAction)twitterPost:(id)sender;
-(IBAction)facebookPost:(id)sender;
@end
Bước 5 - Cập nhật ViewController.m như sau:
#import "ViewController.h"
@interface ViewController ()
@end
@implementation ViewController
- (void)viewDidLoad {
[super viewDidLoad];
}
- (void)didReceiveMemoryWarning {
[super didReceiveMemoryWarning];
// Dispose of any resources that can be recreated.
}
-(IBAction)facebookPost:(id)sender {
SLComposeViewController *controller = [SLComposeViewController
composeViewControllerForServiceType:SLServiceTypeFacebook];
SLComposeViewControllerCompletionHandler myBlock =
^(SLComposeViewControllerResult result){
if (result == SLComposeViewControllerResultCancelled) {
NSLog(@"Cancelled");
} else {
NSLog(@"Done");
}
[controller dismissViewControllerAnimated:YES completion:nil];
};
controller.completionHandler = myBlock;
//Adding the Text to the facebook post value from iOS
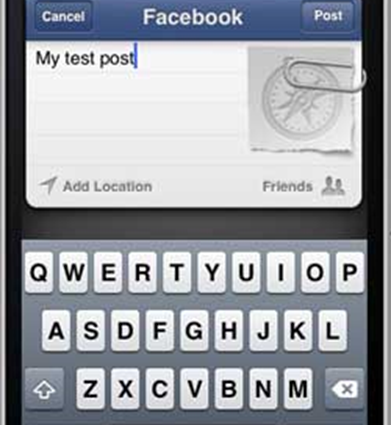
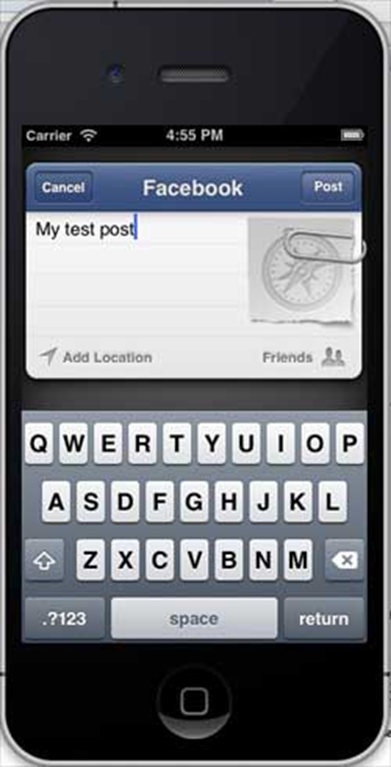
[controller setInitialText:@"My test post"];
//Adding the URL to the facebook post value from iOS
[controller addURL:[NSURL URLWithString:@"http://www.test.com"]];
//Adding the Text to the facebook post value from iOS
[self presentViewController:controller animated:YES completion:nil];
}
-(IBAction)twitterPost:(id)sender {
SLComposeViewController *tweetSheet = [SLComposeViewController
composeViewControllerForServiceType:SLServiceTypeTwitter];
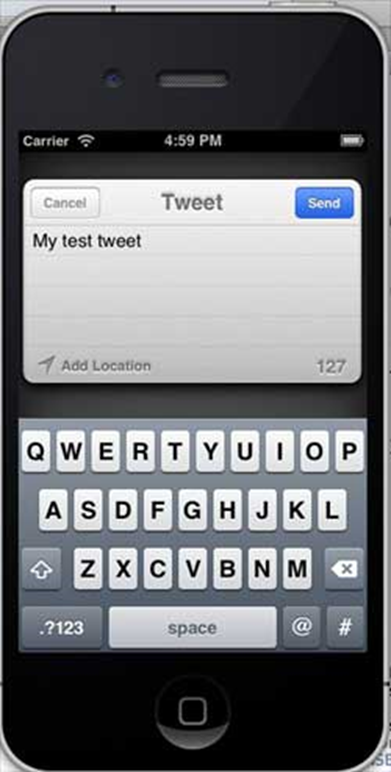
[tweetSheet setInitialText:@"My test tweet"];
[self presentModalViewController:tweetSheet animated:YES];
}
@end
Đầu ra
Khi chúng tôi chạy ứng dụng và nhấp vào facebookPost, chúng tôi sẽ nhận được kết quả sau:
Khi chúng ta nhấp vào twitterPost, chúng ta sẽ nhận được kết quả sau: