Gia tốc kế được sử dụng để phát hiện những thay đổi về vị trí của thiết bị theo ba hướng x, y và z. Chúng ta có thể biết vị trí hiện tại của thiết bị so với mặt đất. Để kiểm tra ví dụ này, bạn sẽ cần chạy nó trên một thiết bị và không hoạt động trên trình mô phỏng.
Gia tốc kế – Các bước liên quan
Bước 1 – Tạo một ứng dụng dựa trên Chế độ xem đơn giản .
Bước 2 – Thêm ba nhãn trong ViewController.xib và tạo ibOutlet đặt tên chúng là xlabel, ylabel và zlabel.
Bước 3 – Cập nhật ViewController.h như sau:
#import <UIKit/UIKit.h>

@interface ViewController : UIViewController<UIAccelerometerDelegate> {
   IBOutlet UILabel *xlabel;
   IBOutlet UILabel *ylabel;
   IBOutlet UILabel *zlabel;
}
@end
Bước 4 – Cập nhật ViewController.m như sau:
#import "ViewController.h"

@interface ViewController ()
@end

@implementation ViewController

- (void)viewDidLoad {
   [super viewDidLoad];
   [[UIAccelerometer sharedAccelerometer]setDelegate:self];
   //Do any additional setup after loading the view,typically from a nib
}

- (void)didReceiveMemoryWarning {
   [super didReceiveMemoryWarning];
   // Dispose of any resources that can be recreated.
}

- (void)accelerometer:(UIAccelerometer *)accelerometer didAccelerate:
   (UIAcceleration *)acceleration {
   [xlabel setText:[NSString stringWithFormat:@"%f",acceleration.x]];
   [ylabel setText:[NSString stringWithFormat:@"%f",acceleration.y]];
   [zlabel setText:[NSString stringWithFormat:@"%f",acceleration.z]];
}
@end
Đầu ra
Khi chúng tôi chạy ứng dụng trên thiết bị iPhone , chúng tôi sẽ nhận được kết quả sau:
iOS – Ứng dụng chung
Ứng dụng phổ quát là ứng dụng được thiết kế cho cả iPhone và iPad trong một tệp nhị phân duy nhất. Một ứng dụng phổ quát cho phép sử dụng lại mã và cập nhật nhanh chóng.
Ứng dụng phổ quát – Các bước liên quan
Bước 1 – Tạo một ứng dụng dựa trên Chế độ xem đơn giản .
Bước 2 – Thay đổi tên tệp tệp ViewController.xib thành tệp ViewController_iPhone.xib như được hiển thị bên dưới trong trình kiểm tra tệp ở phía bên tay phải.

Bước 3 – Chọn Tệp → Mới → Tệp … sau đó chọn tiểu mục “Giao diện người dùng” và chọn Xem . Bấm tiếp.

Bước 4 – Chọn họ thiết bị là iPad và nhấp vào tiếp theo.

Bước 5 – Lưu tệp dưới dạng ViewController_iPad.xib và chọn Tạo.
Bước 6 – Thêm nhãn ở giữa màn hình trong cả ViewController_iPhone.xib và ViewController_iPad.xib .
Bước 7 – Trong ViewController_iPad.xib , chọn trình kiểm tra danh tính và đặt lớp tùy chỉnh là ViewController .
Bước 8 – Cập nhật ứng dụng: phương thức DidFinishLaunching: withOptions trong AppDelegate.m như sau:
- (BOOL)application:(UIApplication *)application
   didFinishLaunchingWithOptions:(NSDictionary *)launchOptions {
   self.window = [[UIWindow alloc] initWithFrame:[[UIScreen
   mainScreen] bounds]];

   // Override point for customization after application launch.
   if (UI_USER_INTERFACE_IDIOM() == UIUserInterfaceIdiomPhone) {
      self.viewController = [[ViewController alloc]
      initWithNibName:@"ViewController_iPhone" bundle:nil];
   } else {
      self.viewController = [[ViewController alloc] initWithNibName:
      @"ViewController_iPad" bundle:nil];
   }
   self.window.rootViewController = self.viewController;
   [self.window makeKeyAndVisible];
   return YES;
}
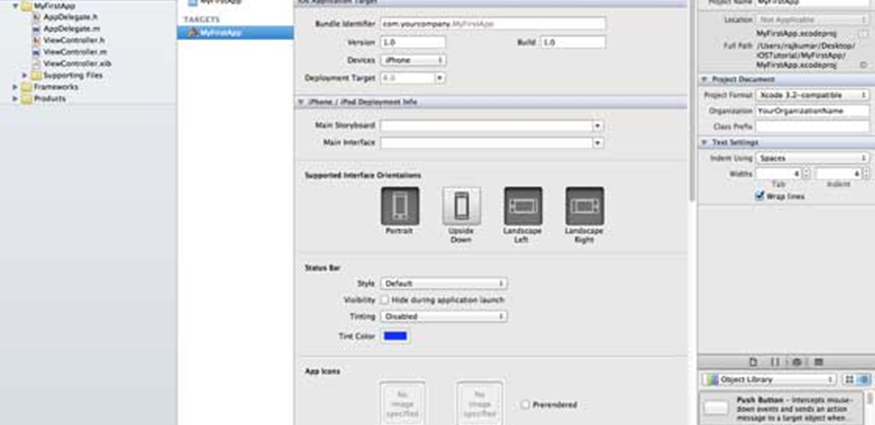
Bước 9 – Cập nhật các thiết bị trong bản tóm tắt dự án thành Universal như hình dưới đây

Đầu ra
Khi chúng tôi chạy ứng dụng, chúng tôi sẽ nhận được kết quả sau:

Khi chúng tôi chạy ứng dụng trong trình mô phỏng iPad, chúng tôi sẽ nhận được kết quả sau:

