1 Mục đích bài viết
Windows Server Update Services (WSUS) là một tính năng dùng để triển khai quản lý cập nhật của Microsoft. Windows server đóng vai trò như là Update Cache chứa các bản cập nhật, ta có thể cho phép máy tính cài đặt cũng như tải về các bản cập nhật từ cache update cho các máy con trong Domain, từ đó giúp quản lý tập trung và giảm thiểu băng thông trong hệ thống mạng của mình.
2 Mô hình
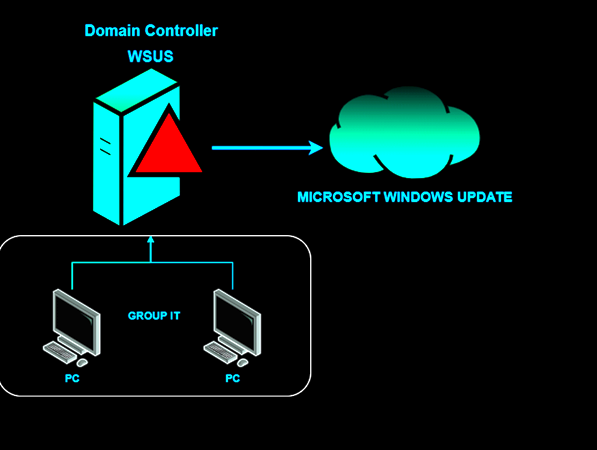
Máy Domain controller sẽ thực hiện triển khai WSUS và áp các policy lên các máy con thuộc group IT trong Domain
3 Các bước cấu hình
3.1 Triển khai WSUS
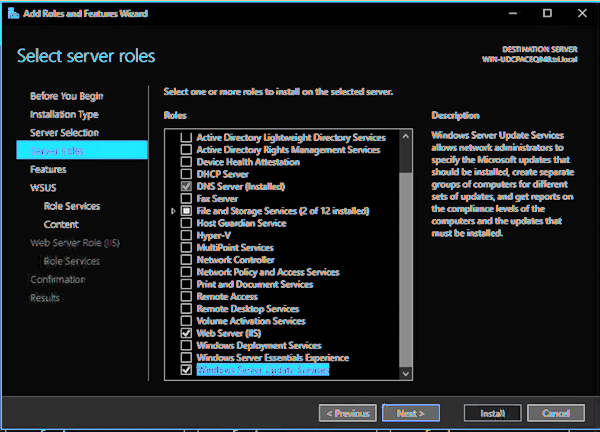
3.1.1 Triển khai feature WSUS Thêm role Windows Server Update Services vào
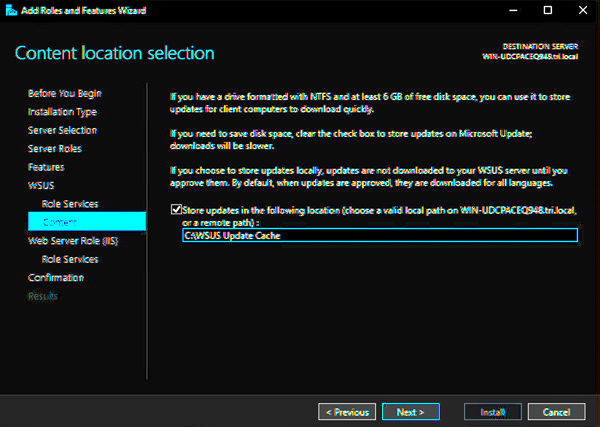
Tiếp tục bấm Next. Và chọn đường dẫn để lưu thông tin về các bản update. Thư mục này phải có quyền ít nhất là read đối với các user trong Domain
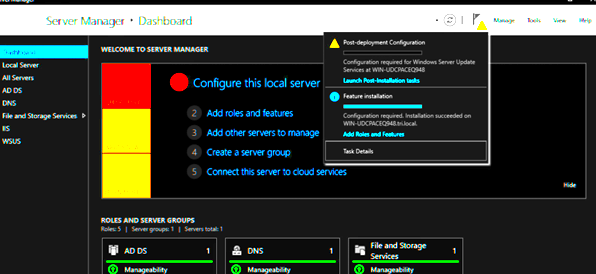
Sau khi add xong ta bấm Launch post installation
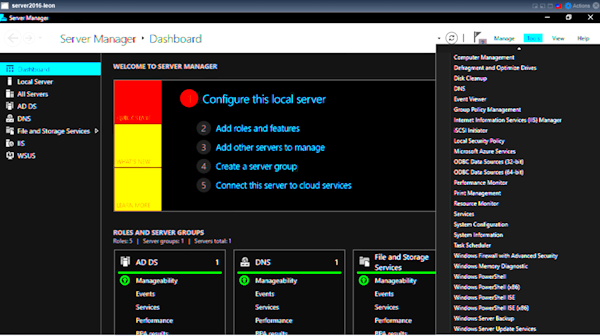
Ta mở Windows Server Update Services

Chọn next và đến mục Specify proxy server bấm start connection
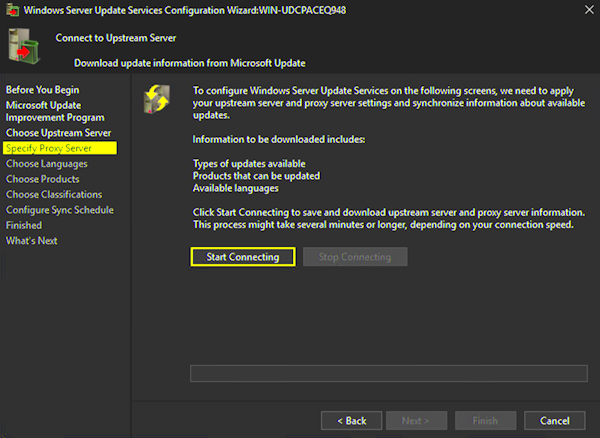
Quá trình kết nối sẽ bắt đầu và sau khi kết nối xong, ta chọn các thành phần cần thiết để cập nhật và cuối cùng bấm finish để hoàn thành.


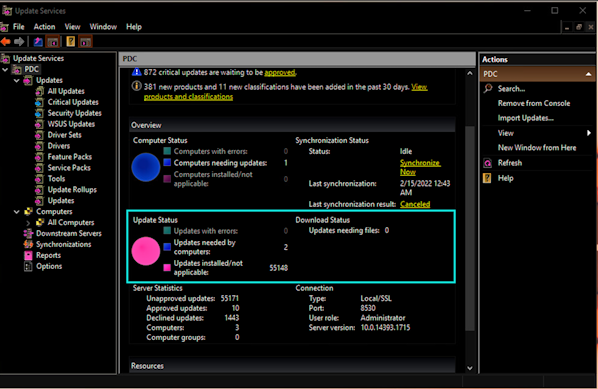
3.1.2 Cấu hình cài đặt cho update Ta mở Windows Server Update Services lên sẽ hiện lên giao diện như sau

Các thông tin về trạng thái Sync sẽ nằm ở đây. Khi có các PC kết nối vào ta có thể click vào Sync now để tìm bản cập nhật thủ công.
Các cài đặt chung sẽ nằm ở mục này

Để kiểm tra những bản cập nhật cần thiết cho máy. Ta sử dụng bộ lọc như sau
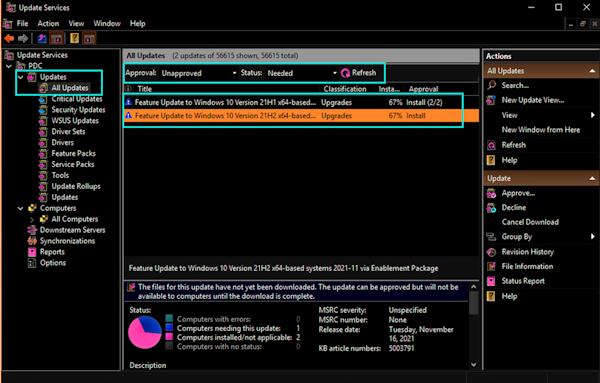
Để cho phép tải và áp dụng bản cập nhật. Ta bấm vào Approve và chọn máy muốn cập nhật


Ta quan sát trạng thái download cập nhật ở đây
3.2 Cài đặt policy
Tại đây ta chỉnh policy cho các máy chọn nguồn update ở WSUS server và chọn các thông số tự động update
Đưa các PC vào group IT

Sau đó tạo policy và link vào group IT. Ta edit policy và vào đường dẫn: Computer Configuration > Policies > Administrative Templates > Windows Components > Windows Update, chuột phải Configure Automatic Updates, chọn Edit:

Tương tự tại mục Specify internet Microsoft update service location ta edit lại đường dẫn update cache.
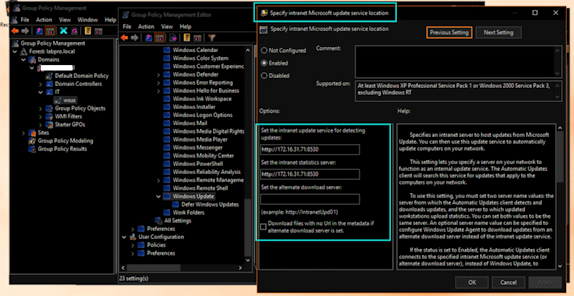
Port 8530 ở đây dùng cho cập nhật qua giao thức http.
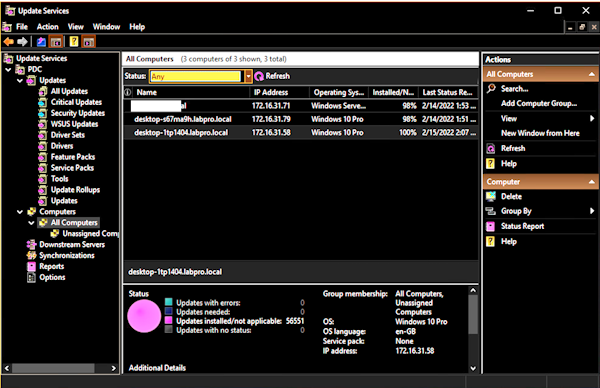
Ta kiểm tra lại máy tính đã được quản lý trên WSUS hay chưa bằng cách vào mục Computer. Tại đây có thể tạo các group computer để dễ áp dụng cập nhật hơn.
3.3 Kiểm tra trên máy PC
Tại máy PC ta mở mục update và xem

Update của máy pc này áp dụng theo chính sách policy của Domain. Ta click Check for update để xem có bản cập nhật mới hay không.
